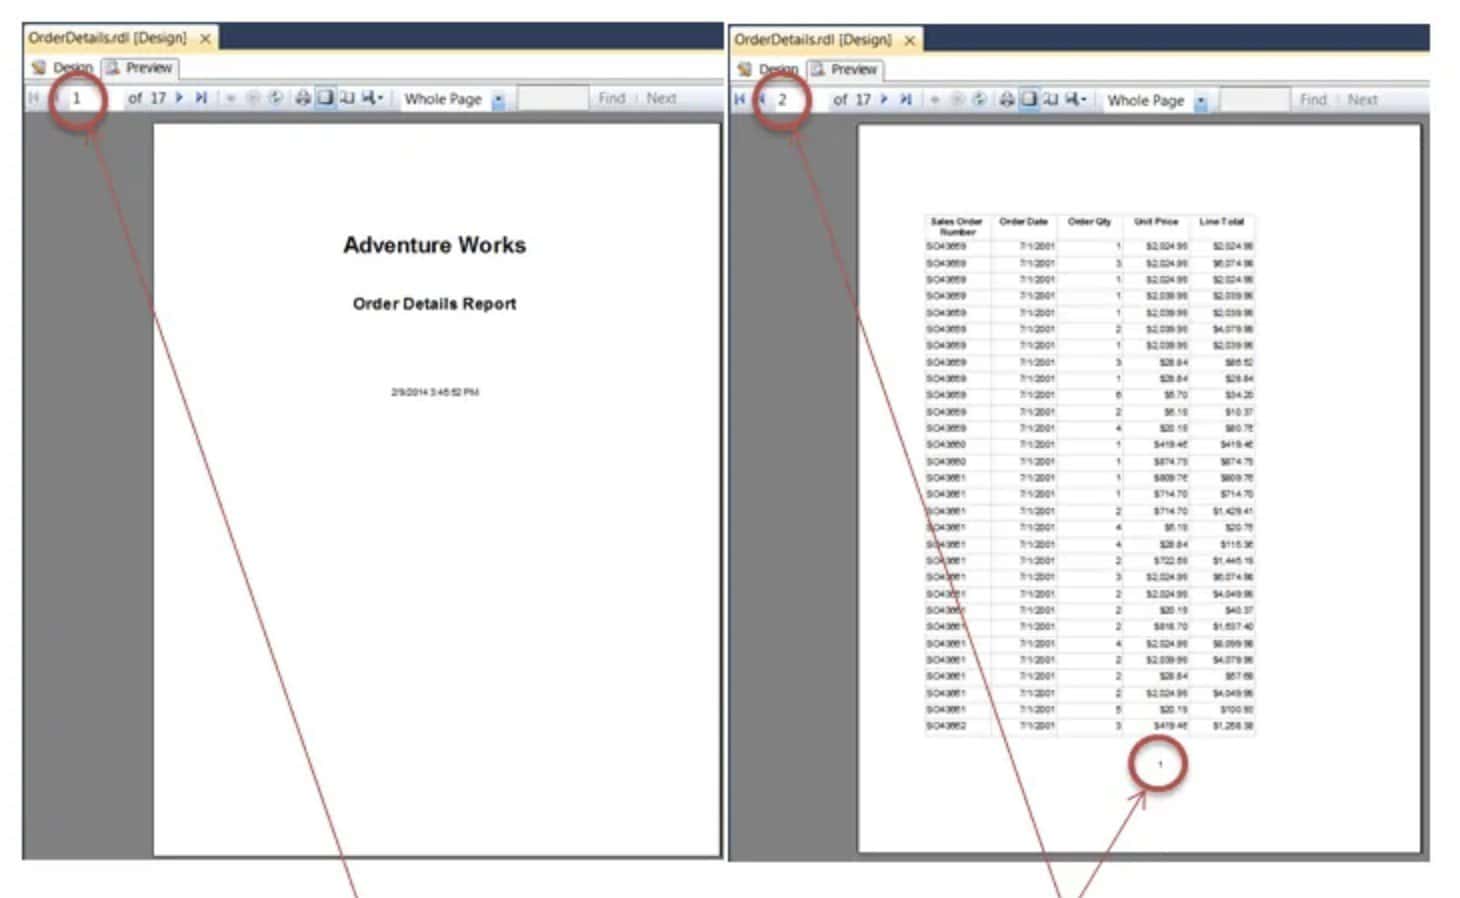
A cover page is simply a page that comes before the report data and that usually contains a report title and other identifying information. It can add clarity to your report and give it a clean, professional look.
The cover page usually doesn’t show any data or page numbers, and the first page of data usually displays as page 1.
Cover pages can be made pretty easily in SSRS. Here’s how it works: Everything you want in your cover page will go into a rectangle that includes a page break after it to separate the cover page from the rest of the report (this ability to do page breaks is the reason we use a rectangle). The rectangle can either go directly into the report header, or it can go into a subreport that in turn goes into the report header.
The advantage of using a subreport is that the cover page doesn’t clutter your report and you don’t have to always negotiate your way around the cover page every time you want to edit your report. The demonstration in this article will show you how to create a cover page using a subreport.
I’m using SQL Server Data Tools 2010 (Visual Studio 2010 + MS BI Libraries) in this demonstration, but you can use Report Builder or other tools that create SSRS rdl files. Actual steps may vary from the ones shown here, though they should be similar.
Create a new report with a rectangle
First, we’ll create a report that will be the actual cover page when it is used as a subreport in the main report. In the same project containing the main report, create a new, blank report called CoverPage that has a single rectangle in it and nothing else.
Open the rectangle’s properties window (right-click on the rectangle and select Rectangle Properties…) and select Add a page break after. This will cause the rectangle to end in a page break, separating the cover page from the rest of the report.
Now you can position the rectangle, change its dimensions, and otherwise format it to look like the cover page you need. Put everything you want on your cover page into the rectangle—textboxes for text, images, lines, even data regions if you need to.
That’s it for the CoverPage report. We can save it and close it.
We’re ready to put it into the main report.
Create the subreport
Open the main report and drag & drop the CoverPage report into the report header (to make a report header, just drag the data region down a bit; the space above it is the report header). The subreport will appear as a gray box with the name of the report it contains—in our case, CoverPage. At first, it will probably overlap your data region and look a little messy. Also notice that the height of the main report increases to accommodate the subreport we just dropped in it. We’ll fix all this in the next step.
To avoid pagination issues, adjust the subreport so that it is up against the top of the report header, as wide as the CoverPage report it contains, and short enough so that it doesn’t overlap the data region. We’ll also need to drag the dotted line at the top of the page footer up a bit to remove some of that white space between the data region and the page footer.
Preview the report to see the cover page (Print Layout view is best). Verify that page 1 is the cover page and that your report data starts on page 2.
This looks good, but notice that there is a page number on the cover page; we want to suppress that. Also, the second page of the report shows page number 2; we want that to print as page 1 and the successive pages to print as 2, 3, and so on.
Let’s fix these problems. First, let’s suppress the page number on the cover page. Right-click in the page footer and select Footer Properties…
In the Page Footer Properties window, uncheck the Print on first page checkbox and click the OK button.
Next, we’ll adjust the actual numbers so that the first data page displays as page 1. Right-click the textbox containing the page number and select Expression…. Subtract from the page number the number of pages in the cover page. This is usually 1, and it is 1 in our example.
Preview the report again and notice that now there is no page number shown on the cover page, the page number shown on page 2 is 1, and successive pages show correct page numbers.
And that’s it! Enjoy!
Peter Avila
SQL Server Instructor – Interface Technical Training


